home about me home tour consultations testimonials contact

Monday, March 31, 2014

Need your opinion...

I ran across this flickr image and thought it was super cool. I've been toying with the idea of building a built-in bench below our stairs but this seems like a really unique and much less expensive option. Plus, I won't be very committed if I get tired of it and decide to try something new in a few years!

So, I did a little Craigslist search for cots and it looks like there's a local one available...
Apparently, it was found in an attic so the seller doesn't know much about its history.

It looks like it's not in the best shape but it does have the wooden base I'm going after. So, there wasn't a price attached, the seller asked for interested buyers to make offers. Agghh! I can't stand situations like this.

I've searched a little and it looks like new cots run around $40 but have a metal frame. There's one vintage cot listed at $70 firm but it looks like it's in much better condition. What would you do? How much would you offer? I know many of you are craigslist experts, so go ahead and impart your wisdom!

Friday, March 28, 2014

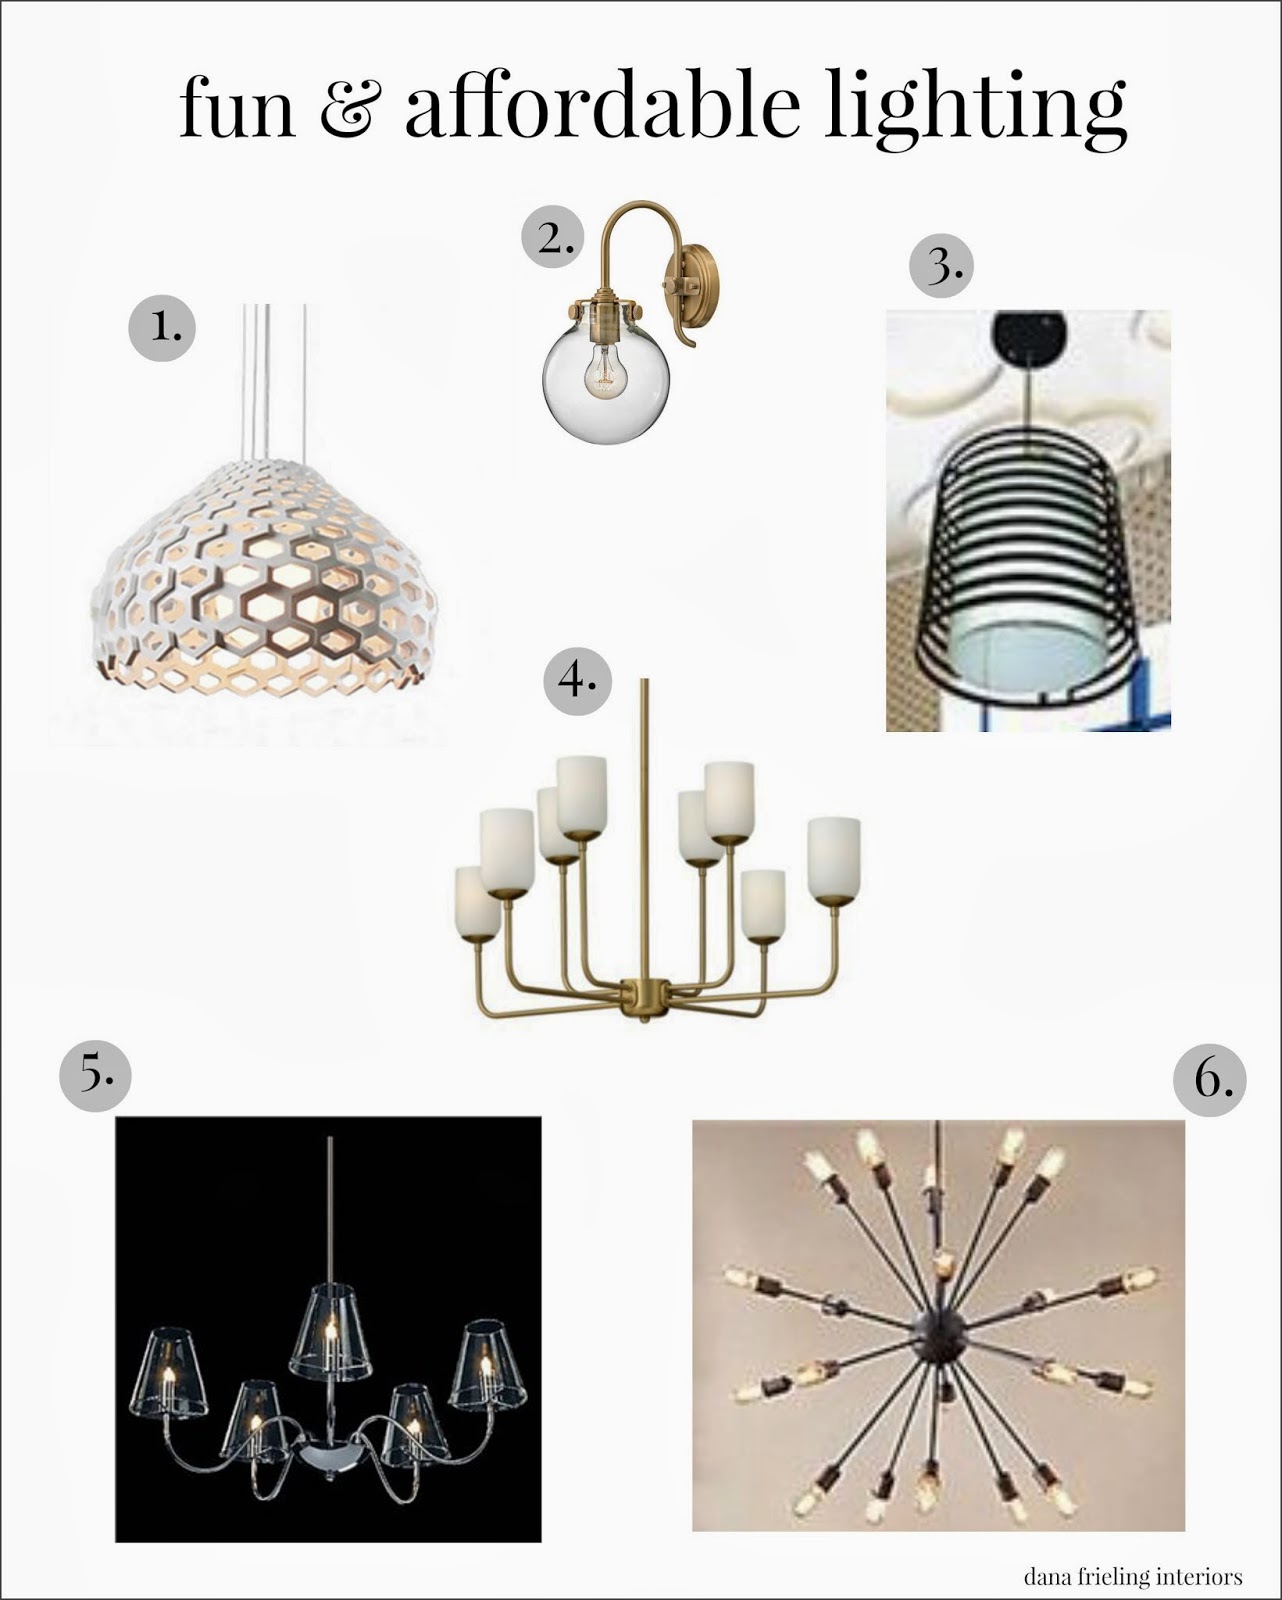
fun & affordable lighting options

I love unique lighting but I don't love the big price tags that so often accompany these pieces. Amen?! Below are a handful of finds that will elevate your design without emptying your pockets.

Click here: 1/2/3/4/5/6

Happy weekend, friends!

Wednesday, March 26, 2014

Inspiring Design and bathroom paint

I was fortunate enough to tag along on John's business trip and spent the the last several days in Vegas. While Vegas isn't my favorite place on earth, it sure was nice to lay poolside in 85 degree weather while smelling the aroma of orange trees in full bloom. I only say that to give you guys hope who are still dealing with the crazy snow...spring is coming, I promise!!

I spent a little time walking around and taking in the amazing designs Vegas has to offer. I was blown away by the architecture in Aria. Talk about inspiration!

Check out this agate staircase...

It's absolutely stunning in person! John and I were talking about how incredible it'd be to dream up something off the charts like this and have the people on your team to make it happen. Such a dream come true.

Isn't this an incredible structure? It's houses a restaurant on the middle level and the concierge desk below.

My parents have been watching the kiddos while we've been gone and they were a little worried about being bored during the daytime hours while they were at school. I took full advantage of their possible boredom and left my dad with a couple paint cans, rollers and our master bathroom! (Don't worry, he loves to paint...seriously.) I can't wait to get home to see it (and the kids, of course). 

Here's what we decided on...
With the walls complete, I don't have any other excuses to keep me from tackling painting those silly cabinets. I'm a little scared...we have lots of cabinets!

Friday, March 21, 2014

How to hide the uglies

I titled this post before I added the picture of my new do, but it still kind of fits. Too funny! I don't like including pictures of myself on the blog much but I always like it when other people do. It's fun having a face to go with the verbiage, so here ya go...
I always know it's time for a haircut when I realize it's been way too long since I've worn my hair down. The lazy doo-doo roll becomes an everyday habit and the only way for me to break it is to chop it all off so it's not an option anymore!

Moving on to a design-related topic...

This may be a little obvious but just in case it isn't, I wanted to give you the 'behind the scenes' look at how I hid our unsightly breaker box and sprinkler system control box. It's pretty simple...we used a L-bracket. Since my 'art' is a chart, it worked out perfectly.

It stands away from the wall enough to act as a shield while continuing to allow easy access to the boxes if/when need be. There's another function that's not pictured. Can you guess what it is? Yep, there's just enough room to put a hanger or two up there if a piece of clothing needs to dry. Dual purpose greatness!
 
I walk through the laundry room a gazillion numerous times a day since it's a pass through to our garage. I love having a more inviting entrance and exit for our family.

Tuesday, March 18, 2014

No cost makeover (Before/After Pics!)

I've had it with wheat colored walls! I've been a painting machine and I've almost eradicated our entire house of this color. Once the guest room is painted then there will be no evidence of this golden hue anywhere. Can't wait!

I initially thought I could endure this color in the laundry room so it was low on the list of priorities. But as soon as I realized I had just enough paint left over from our office...boom, it was a no brainer.

I didn't want to spend a lot, okay, any money in this area of the house. So I've come up with "4 no cost tips" that show you how I achieved my goal...

No cost tip #1: Use leftover paint.  Laundry rooms are typically small spaces so leftovers work great.

BEFORE:

AFTER:

No cost tip #2: Shop your house for accessories. 

Don't be afraid to dig in those closets! I had the hanging chart in our guest room but knew I didn't want it there for the long haul so it made for an easy decision to pull it into this space. Stay tuned for the simple 'how to hide the uglies' post where I show you how I hung the chart.

No cost tip #3: Use unused baskets as your laundry basket. 

The striped basket had been moved all over the house but never really had a function. One day the light bulb went off and I realized laundry baskets don't have to be white and plastic. Ding, ding, ding...let's give it a function and let it hide our dirty clothes until they're ready to jump into the washer! (Don't you wish they did that on their own?)

BEFORE:


No cost tip #4: Revamp items that bug you.

This one needs a little explaining. Scroll back up to the before picture. See the scrolls on top of the hooks? My taste has changed since I made this purchase as I tend to lean towards less ornate items now. So, instead of trashing this and buying a new one, we simply sawed off the scrollwork. In less than 5 minutes the hooks were transformed into a piece that didn't make me cringe every time I looked at it.

Quite the transformation for something that didn't cost a cent, right?! It almost, just almost makes me want to do laundry now. ;)

Wednesday, March 12, 2014

Bathroom Cabinet Before and After

Our master bath has a tiny 'toilet room' that houses the toilet and shower. One of the first things we did after moving in was remove the doors from the cabinet above the toilet. It was a must to make this space feel larger.

Before:
We ripped the doors off so quick that I don't have a proper before picture. Here's a picture of the other cabinets so you'll have an idea of what the area looked like with the doors. They have a really bad stain job and the color is, well, just yucky.


After:


Here's a basic breakdown of the details:


There are a handful of steps not represented here, like using wood filler to patch the holes left behind from door hinges and caulking around the stained panels and trim pieces. 

Curious what products we used? Here are the main players: 

One last look at the finished project...
Ahhh, much better!

Linking to: Tip Junkie

Monday, March 10, 2014

Art by Lisa Golightly

I can't thank you enough if you're one of the sweet friends that left a kind message on Friday's post. We feel our hurts heal a little each day. Thanks again for sharing your thoughts, stories and words of empathy. It really means a lot to me.

On a lighter note, I love finding new artists. Have you seen the beautiful work of artist, Lisa Golightly? I ran across the piece below on One Kings Lane and it mysteriously kept showing up in my facebook feed. (Side note, I think it's super creepy how you look at something once then suddenly it shows up everywhere.)
I guess the advertising gimmick totally worked because I purchased a print of the precious, faceless boy. I'm not exactly sure what it is, but there's something that draws me in when I look at it. "That" is what I mean when I tell clients that art is personal and you have to pick the pieces that "speak" to you.


I think it's the simplicity that I love. And, her shading is amazing.

This piece is coming to live in our house too!


Lisa's Etsy shop is Kiki and Polly. Do yourself a favor and take a second to check out her other works of art!
Related Posts Plugin for WordPress, Blogger...
 
Blogging tips