Okay friends, there's a ton of information in this post so strap on your seat-belts and get ready!
Pin ItOur diamond wall began with a geometry class. First, we decided what size to make the diamonds. I had a very scientific method for this step. I searched around the house for something I could use as a pattern!
This is what I found:
Ummm, that looks like the perfect shape. Let's hold it up on the wall and get a visual. Yep, that'll work! Bust out the masking tape.
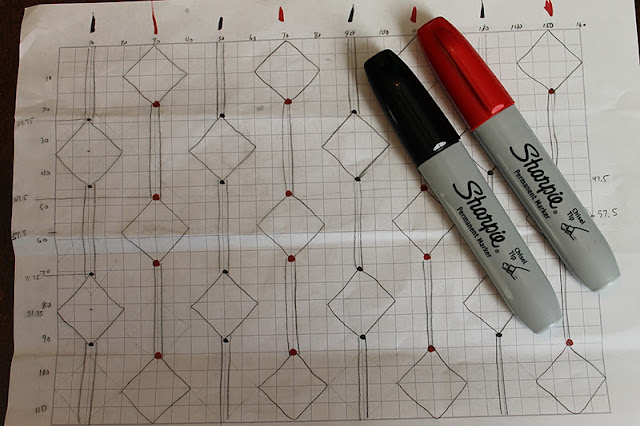
Next, measure the wall and create a piece of graph paper in Excel. Our wall measured 160 inches x 115 inches. The "diamond" is actually a 14 inch x 14 inch square. When turned to form the "diamond" shape, it measures 20 inches from point to point.
To determine how many columns:
Take the length of your wall and divide it by the size of the diamond.
Example: 160 in. / 20 inches= 8 columns
Decide on your pattern:
Determine the amount of diamonds you want in each column. We decided to use 2 diamonds in the first column, 3 in the second column, then repeat.
Use your graph paper to plot out your pattern/spacing.
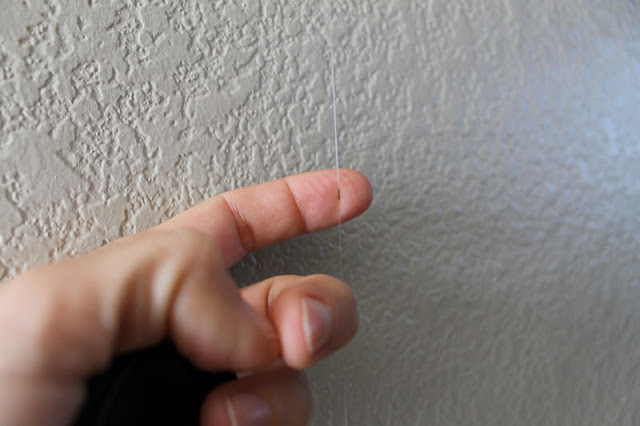
Now it's time to transfer the grid to the wall. John came up with a ninja method for this step! He used thumbtacks and fishing line to create a plumb line. The plumb line marked the center of each column.
Next, we marked the line with dots to correspond with the top and bottom points of each diamond on the grid (this included 5 diamonds on 1 line). Since there was only one fishing line, it was important to differentiate between columns. We did this by color coding: Black dots = odd columns and Red dots = even columns.
Example: Your fishing line is in place for the first column. Look for black marks on the line. Use black sharpie to transfer this point onto your wall. Next, move the line to the next column. Now look for the red dots (ignore black dots in this column). Use your red sharpie to transfer these points onto the wall. Repeat until all diamond placements are marked on the wall.
There you have it...your wall is marked, now bring on the power tools!
We purchased:
(5) 10 ft. 1x4s of first choice pine, as well as, (4) 8 ft. 1x4s (we used the table saw to rip these boards lengthwise)
Liquidnails
Dap wood filler
1 quart of paint- color match of Benjamin Moore, Senora gray 1530 (eggshell finish used for wall and semi-gloss for diamond treatment)
paint brush
brads for nail gun
fine-grit sandpaper
Approximate cost: $130.00
Equipment used:
Miter saw
Band saw
Table saw
Finishing nail gun
Once the boards were ripped into our desired width, we began making the diamonds.

Holding your pencil in your mouth really helps with this step!
Once the mitered edges are all cut, put 4 of the pieces together to form the diamond and attach each corner with finishing nails. Now, fill in the nail holes and the corners with dap wood filler. Love this stuff...makes ya feel like you're icing a cake but even better since it changes colors! Goes on pink and dries white.
Give it all a good rubdown with fine grit sandpaper. This helps to ensure the paint adheres easily and doesn't show any bumps from the leftover wood filler.
Use the band saw to cut your straight pieces. These are not all the same lengths, so measure carefully. We marked each piece on the back with numbers so we knew which piece went where when we were ready to assemble the treatment.
Can't believe I don't have any pictures of the painting process, but you all know what that looks like. I would advise to buy a new paint brush though. I bought a Purdy. Good bristles help to cut down on all those annoying streaks.
After painting, apply a little liquid nails then smack those babies onto the wall. This is where you get to play connect-the-dots with the red and black dots you marked earlier when creating the grid. In the first row, look for the first black dot and align the top of your diamond with it. If done correctly, the bottom of the diamond should align perfectly with the second black dot. Now move down the wall and repeat. We put finishing nails in for extra stability.
"Really, Dana? Must you take another picture?!" thinks John.
After cutting the straight pieces, we put the puzzle together to double check our cuts.
Okay, they fit...now for more sanding, painting, and attaching.

The edges were really rough initially so we sanded them down, added more dap and touched up the paint. This helped create a smoother transition between the pieces. Anyone know where my finished picture went? Darn...forgot to take the close-up!
Well, I've now officially spent more time writing this post than we did creating the wall! Not really, but it certainly feels like it. Feel free to email me specific questions. There was a lot of content and some of it is really difficult to put into words.
Here's the part where I get to sing John's praises. He is the math wizard that came up with all the specifics. I just stood over his shoulder, nodded and said, "Yes, honey, that sounds perfect!" He was also very patient when I announced it was time for me to learn how to use all the tools. He was probably thinking, "Good. The sooner she learns, the sooner these are her projects instead of our projects!" Just kidding, he's much nicer than that.
I hope this project inspires you to try something out of your comfort zone, friends. I was intimidated but I conquered...what's next?
Need a little push out of your comfort zone? I'd love to help you create something fun in your house, just contact me.
Linking to: Today's Creative Blog
My Uncommon Slice of Suburbia
Savvy Southern Style
Sugar and Dots
Shine Your Light
The Shabby Nest
Five Days...5 Ways


